
SpringBoot与Shiro整合 (二)
六、加入mybatis
继续改进代码,之前只是在UserRealm中写了一些模拟数据,那么接下来,就从数据库中读取数据,这里使用mybatis-plus
User实体
@Data
@EqualsAndHashCode(callSuper = true)
@TableName("t_user")
@ApiModel(value = "用户pojo对象",description = "这是用户对象 ")
public class User extends Model{
    private static final long serialVersionUID = 1L;
    @ApiModelProperty("用户主键id")
    @TableId(value = "user_pkid", type = IdType.AUTO)
    private Integer userPkid;
    @ApiModelProperty("用户注册名")
    private String username;
    @ApiModelProperty("用户密码")
    private String password;
    @ApiModelProperty("用户昵称")
    private String nickname;
    @ApiModelProperty("注册时间")
    private LocalDateTime regTime;
    @ApiModelProperty(hidden = true)//hidden = true 不在api文档中显示
    private Integer fkDetailId;
    @ApiModelProperty(hidden = true)
    private Integer fkDeptId;
    @ApiModelProperty(hidden = true)
    @TableLogic
    private Integer deleted;
}
UserMapper
@Repository
public interface UserMapper extends BaseMapper<User> {
}
IUserService
public interface IUserService extends IService<User> {
    User findUserByUsername(String username);
}
UserServiceImpl
@Service
public class UserServiceImpl extends ServiceImpl<UserMapper, User> implements IUserService {

    @Autowired
    private UserMapper userMapper;

    @Override
    public User findUserByUsername(String username) {
        QueryWrapper<User> queryWrapper = new QueryWrapper<>();
        queryWrapper.eq("username",username);
        User user = userMapper.selectOne(queryWrapper);
        return user;
    }
}
修改UserRealm
public class UserRealm extends AuthorizingRealm {

    @Override
    protected AuthorizationInfo doGetAuthorizationInfo(PrincipalCollection principalCollection) {
        System.out.println("执行授权逻辑");
        return null;
    }

    @Autowired
    private IUserService userService;

    @Override
    protected AuthenticationInfo doGetAuthenticationInfo(AuthenticationToken authenticationToken) throws AuthenticationException {
        System.out.println("执行认证逻辑");

        UsernamePasswordToken token = (UsernamePasswordToken)authenticationToken;

        User user = userService.findUserByUsername(token.getUsername());

        if(user == null){
            return null;
        }

        return new SimpleAuthenticationInfo(user,user.getPassword(),"");
    }
}
现在修改的比较简单,只是从之前的假数据,改成了从数据库中读取而已。其他的基本没做变化,打开页面再做测试就是直接从数据库中读取数据了
为了在页面看到session中的效果,将index.html页面再添加一个thymeleaf的实现
<!DOCTYPE html>
<html lang="en" xmlns:th="http://www.thymeleaf.org">
<head>
    <meta charset="UTF-8">
    <title>Title</title>
</head>
<span th:text="|欢迎你:${session.user==null ? '' :session.user.nickname}|">登录</span> <br>
<body>
进入用户新增页面 <a href="/user/add">用户新增</a>
<br><br>
进入用户更新页面 <a href="/user/update">用户更新</a>
</body>
</html>
位置如下:
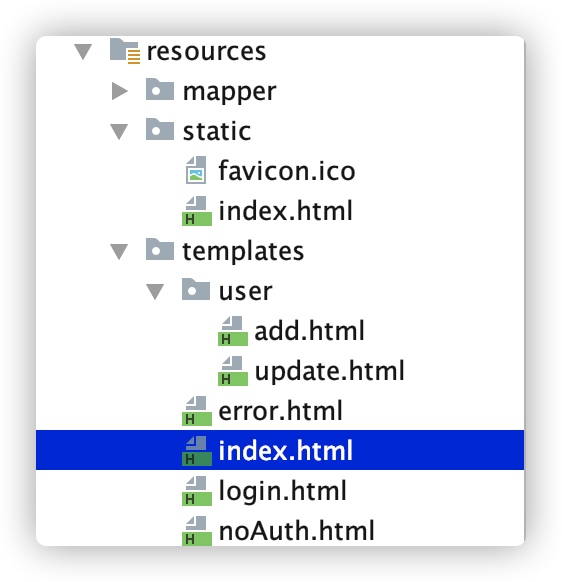
这样的话,为了能够访问到这个页面,Controller和ShiroConfig文件中都需要进行修改 Controller
@RequestMapping("/toIndex")
public String toIndex(){
    return "index";
}
ShiroConfig
@Bean
public ShiroFilterFactoryBean getFilterFactoryBean(DefaultWebSecurityManager securityManager){
    ShiroFilterFactoryBean shiroFilterFactoryBean = new ShiroFilterFactoryBean();
    shiroFilterFactoryBean.setSecurityManager(securityManager);
    //设置登录url
    shiroFilterFactoryBean.setLoginUrl("/user/toLogin");

    Map<String,String> map = new LinkedHashMap<>();
    map.put("/index","anon");
    map.put("/user/toIndex","anon");
    map.put("/user/login","anon");
    map.put("/user/**","authc");

    shiroFilterFactoryBean.setFilterChainDefinitionMap(map);

    return shiroFilterFactoryBean;
}
前台index要获取到Session,那么我们需要将保存到Subject中的数据放入到HttpSession中才能直接读取,所以,还需要将后台UserRealm再做修改
@Override
protected AuthenticationInfo doGetAuthenticationInfo(AuthenticationToken authenticationToken) throws AuthenticationException {
    System.out.println("执行认证逻辑");

    //1、判断用户名,token中的用户信息时登录的时候传进来的
    UsernamePasswordToken token = (UsernamePasswordToken)authenticationToken;

    User user = userService.findUserByUsername(token.getUsername());

    if(user == null){
        return null;//返回null,shiro底层会抛出UnknownAccountException
    }

    SimpleAuthenticationInfo authcInfo = new SimpleAuthenticationInfo(user, user.getPassword(), this.getName());

    //清缓存中的授权信息,保证每次登陆 都可以重新授权。因为AuthorizingRealm会先检查缓存有没有 授权信息,再调用授权方法
    super.clearCachedAuthorizationInfo(authcInfo.getPrincipals());
    //从Subject中获取到Session把对象保存到session中
    SecurityUtils.getSubject().getSession().setAttribute("user",user);

    return authcInfo;
}
当然,如果你不想再将Subject中的数据再取出来,再放入到session中,可以使用thymeleaf和shiro的整合
七、thymeleaf和shiro的整合
1、导入thymeleaf对shiro的扩展坐标
 <!-- 导入thymeleaf对shiro的扩展坐标 -->
<dependency>
    <groupId>com.github.theborakompanioni</groupId>
    <artifactId>thymeleaf-extras-shiro</artifactId>
    <version>2.0.0</version>
</dependency>
2、配置ShiroDialect
在ShiroConfig中加入
@Bean
public ShiroDialect getShiroDialect(){
    return new ShiroDialect();
}
3、页面使用
<!DOCTYPE html>
<html lang="en" xmlns:th="http://www.thymeleaf.org" xmlns:shiro="http://www.pollix.at/thymeleaf/shiro">
<head>
    <meta charset="UTF-8">
    <title>Title</title>
</head>
<body>
<p shiro:guest="">
    Please <a href="login.html">Login</a>
</p>

<p shiro:user="">
    Welcome back <shiro:principal property="nickname" />!
</p>

<br>
欢迎你:<shiro:principal property="nickname" />
<br>
进入用户新增页面 <a href="/user/add">用户新增</a>
<br><br>
进入用户更新页面 <a href="/user/update">用户更新</a>
</body>
</html>
具体的一些页面shiro标签使用,可以参考https://github.com/theborakompanioni/thymeleaf-extras-shiro
八、shiro授权
上面的代码说到底,只是实现了用户登录认证,然后使用过滤器直接过滤登录成功跳转到哪里,不成功跳转到里,接下来就需要给用户授权
首先,没有某些权限的用户,应该就不能访问某些页面
添加没有权限需要跳转的noAuth页面
<!DOCTYPE html>
<html lang="en">
<head>
    <meta charset="UTF-8">
    <title>Title</title>
</head>
<body>
未经授权无法访问该页面
</body>
</html>
修改ShiroConfig文件,添加相关权限内容
@Bean
public ShiroFilterFactoryBean getFilterFactoryBean(DefaultWebSecurityManager securityManager){
    ShiroFilterFactoryBean shiroFilterFactoryBean = new ShiroFilterFactoryBean();
    shiroFilterFactoryBean.setSecurityManager(securityManager);
    //设置登录url
    shiroFilterFactoryBean.setLoginUrl("/user/toLogin");
    //没有权限的url
    shiroFilterFactoryBean.setUnauthorizedUrl("/user/noAuth");
    //成功的url
    //shiroFilterFactoryBean.setSuccessUrl("/index");

    Map<String,String> map = new LinkedHashMap<>();
    map.put("/index","anon");
    map.put("/user/toIndex","anon");
    map.put("/user/login","anon");

    map.put("/user/add","perms[user:add]");
    map.put("/user/update","perms[user:update]");

    map.put("/user/**","authc");

    shiroFilterFactoryBean.setFilterChainDefinitionMap(map);

    return shiroFilterFactoryBean;
}
修改UserRealm文件,给当前用户添加了添加的权限,也就是可以直接访问/user/add路径的权限
@Override
protected AuthorizationInfo doGetAuthorizationInfo(PrincipalCollection principalCollection) {
    System.out.println("==========执行授权逻辑==========");
    SimpleAuthorizationInfo simpleAuthorizationInfo = new SimpleAuthorizationInfo();
    simpleAuthorizationInfo.addStringPermission("user:add");
    return simpleAuthorizationInfo;
}
不过实际上,直接在Config文件中配置perm[xxx]这种权限的方式一般都不会这么做,在配置过滤中,一般都只是会简单过滤anon和authc就可以了,类似于下面这样:
Map<String, String> filterMap = new LinkedHashMap<>();
filterMap.put("/webjars/**", "anon");
filterMap.put("/druid/**", "anon");
filterMap.put("/sys/login", "anon");
filterMap.put("/swagger/**", "anon");
filterMap.put("/js/**", "anon");
filterMap.put("/css/**", "anon");
filterMap.put("/imgs/**", "anon");
filterMap.put("/swagger-ui.html", "anon");
filterMap.put("/swagger-resources/**", "anon");

filterMap.put("/**", "auth");
至于其他的perm[xxx]这种过滤。一般都使用注解的配置,在ShiroConfig中加入注解配置
/**
 * 开启aop注解支持
 * 即在controller中使用 @RequiresPermissions("user:add")
 */
@Bean
public AuthorizationAttributeSourceAdvisor authorizationAttributeSourceAdvisor(DefaultWebSecurityManager securityManager){
    AuthorizationAttributeSourceAdvisor attributeSourceAdvisor = new AuthorizationAttributeSourceAdvisor();
    //设置安全管理器
    attributeSourceAdvisor.setSecurityManager(securityManager);
    return attributeSourceAdvisor;
}

@Bean
@ConditionalOnMissingBean
public DefaultAdvisorAutoProxyCreator defaultAdvisorAutoProxyCreator() {
    DefaultAdvisorAutoProxyCreator defaultAAP = new DefaultAdvisorAutoProxyCreator();
    defaultAAP.setProxyTargetClass(true);
    return defaultAAP;
}
在相应的,需要有权限验证的Controller中加入注解@RequiresPermissions
@Controller
@RequestMapping("/user")
@Api(tags="用户相关操作接口")
public class UserController {
    @RequestMapping("/add")
    @RequiresPermissions("user:add")
    public String add(){
        return "user/add";
    }

    @RequestMapping("/update")
    @RequiresPermissions("user:update")
    public String update(){
        return "user/update";
    }
    ......
}
这样,就完成了注解的权限授权
不过,还有个bug,如果现在进入没有权限的页面,直接会报出异常,而不是跳转到我们之前设置好的noAuth页面
 Shiro注解模式下,登录失败与没有权限都是通过抛出异常。并且默认并没有去处理或者捕获这些异常。在SpringMVC下需要配置捕获相应异常来通知用户信息
要解决其实也很简单,直接自定义异常的捕获就好了,在ShiroConfig中加入注解:
@Bean
public SimpleMappingExceptionResolver simpleMappingExceptionResolver() {
    SimpleMappingExceptionResolver resolver = new SimpleMappingExceptionResolver();
    Properties properties = new Properties();

    /*未授权处理页,注意这里直接跳转页面,不需要在经过Controller*/
    properties.setProperty("org.apache.shiro.authz.UnauthorizedException", "noAuth");

    resolver.setExceptionMappings(properties);
    return resolver;
}
当然这么做的前提是你的代码里面没有设置全局异常处理的类,如果说代码中有全局异常处理的内容,还是会先按照处理异常
九、退出logout
退出可以直接调用Shiro的LoginoutFilter过滤器帮我们实现退出的功能,甚至不需要我们写任何代码,在LoginoutFilter.class类中已经帮我们处理好了相关session的处理甚至是页面的跳转
我们只需要在页面添加退出的标签和url地址,这个url地址都可以是不存在的,地址的作用只是为了让Filter进行过滤
<p shiro:user="">
    Welcome back <shiro:principal property="nickname" />! <a th:href="@{/logout}">退出</a>
</p>
我们可以选择直接配置,和自己编写Controller代码,当然,一般都选择编写Controller代码,非常简单,只需要使用SecurityUtils.getSubject().logout();一句话,就能直接退出了
@RequestMapping("/logout")
public String logout(){
    SecurityUtils.getSubject().logout();
    return "index";
}
如果使用直接配置需要在后端过滤器的Map中,加入logout过滤
map.put("/logout","logout");
不过这么做在退出后,会自动跳转到项目的根目录,读一下LoginoutFilter.class源代码就知道原因了
LoginoutFilter.class
public static final String DEFAULT_REDIRECT_URL = "/";
private String redirectUrl = "/";
所以,如果想退出后,跳转到到我们定义的路径,只有重新设置redirectUrl的值,做法就是通过shiroFilterFactoryBean重新定义LoginoutFilter
...
LogoutFilter logoutFilter = new LogoutFilter();
logoutFilter.setRedirectUrl("/user/toIndex");

Map<String, Filter> filters = shiroFilterFactoryBean.getFilters();
filters.put("logout",logoutFilter);

map.put("/logout","logout");
...
Comments